Как установить свой рингтон на iPhone без iTunes и компьютера

Работа с рингтонами на iPhone — не самая удобная вещь, особенно если вы захотели установить собственный рингтон на звонок или мелодию на уведомления, не из тех, что подготовила для вас Apple. Однако возможности установки собственных мелодий есть, причем не обязательно для этого использовать ПК и iTunes.
В этой инструкции — простой способ создать и установить свои рингтоны на iPhone, используя лишь сам телефон и предустановленные бесплатные приложения.
Скачивание рингтона и его установка на iPhone
Первый шаг — скачать нужный рингтон откуда-либо, причем скачать его в приложение «Файлы».

- Сделать это можно с помощью любого браузера с любого сайта рингтонов. Подойдут и mp3 и m4a форматы файлов, также поддерживаются midi, aiff, wav.
- После скачивания файл, вероятнее всего, не окажется в папке «Загрузки»: он может отобразиться для проигрывания прямо в браузере, либо появиться как уведомление об успешном скачивании. В этом случае нам достаточно будет использовать кнопку «Поделиться» в браузере и выбрать пункт «Сохранить в файлы».
Теперь файл есть на телефоне, виден в папке загрузок в приложении «Файлы» и можно приступать к основным действиям по установке своего рингтона на iPhone.
Потребуется выполнить следующие шаги:
- Запустите приложение GarageBand на вашем iPhone. Это предустановленное бесплатное приложение, но, если вы его ранее удалили — просто скачайте его снова в App Store.
- Создайте любую новую песню. Например, выберите ударные, нажмите по кнопке «Запись», сыграйте что-нибудь и нажмите по кнопке «Стоп».

- Нажмите по кнопке просмотра записанных треков, чтобы перейти в вид отображения дорожек вашей записи.
- Нажмите по кнопке «Loop» справа вверху.

- Перейдите на вкладку «Файлы» и нажмите «Просмотреть объекты из приложения Файлы». Выберите нужный вам скачанный ранее файл и перетащите его на новую дорожку.
- Вернувшись к отображению дорожек, нажмите по инструменту ранее записанной вами самостоятельно дорожки и выберите пункт «Удалить», чтобы осталась только дорожка рингтона.

- Вернитесь к списку песен (нажмите по стрелке слева вверху).
- Выполните долгий тап по песне с рингтоном, выберите пункт «Поделиться».

- Нажмите «Рингтон», укажите название рингтона, дождитесь завершения экспорта.

- В результате рингтон будет в списке доступных для установки на вашем телефоне — для звонков, уведомлений или конкретного контакта.

Если вы хотите добавить больше рингтонов, то после того, как вы всё проделали в первый раз, шаги 1-3 можно пропустить: просто открываем ранее созданную песню, добавляем новый файл на дорожку, удаляем старый и снова выполняем экспорт рингтона под нужным именем.
Там же в GarageBand можно выполнить обрезку больших песен, выполнить другие действия по редактированию файла в случае, если был импортирован не готовый к использованию рингтон, а песня полностью или аудиофайл, в котором вы что-то хотели бы изменить.
Видео инструкция
Если остаются вопросы на тему установки рингтона — задавайте в комментариях, постараюсь помочь.
А вдруг и это будет интересно:
- Лучшие бесплатные программы для Windows
- 403 Forbidden — что это за ошибка и как исправить?
- CUDA System Memory Fallback — включать или нет?
- Как переместить папку «Загрузки» в Windows 11
- Тормозит мышь в Windows — варианты решения
- Как удалить пользователя Windows 11
iTunes for Windows
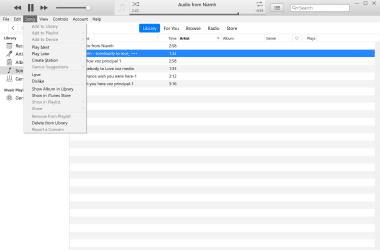
iTunes for Windows has a big job cut out for it. In the age of SaaS, the idea of downloading a music app is somewhat quaint, as well as the fact that, as one of Apple’s most famous pieces of software, iTunes isn’t an immediate slam-dunk for many Windows users.
A full-featured and remarkably versatile media player
Apple’s geriatric media player is looking pretty sprightly
That said, it’s actually a pretty impressive app. For starters, it offers you a multitude of media options. Of course, you’ll get old favorites like music and video, but iTunes also offers you access to podcasts, TV programs, radio, items from the App store, and audio books, all from within the same interface.
iTunes is designed to work best when you’re signed into an Apple account. Once you’re in, you can access your local iTunes libraries, wherever they may be — on another computer, an iPhone, etc. This is a gateway into the Apple ecosystem and the way many Windows users set things up so as to have at least a toe in the Appleverse. If you’re a Windows user who also uses an iPhone (!), iTunes is the primary way you will manage syncing.
Windows/Apple debate aside, iTunes is a great app for those who like significant customization and input into the way their media plays. For many, all the options offered by iTunes are simply unnecessary but there will be a small number who do, in fact, want to control everything from a central hub or exercise huge control over playlists or streaming options.
Visually, the app is sleek and easy to navigate and has a nice mini-player that lets you close the main window when playing your music. You’ll find it easy and intuitive to move from music to movies and podcasts to the iTunes Store, and when you do, you’ll find another pro — the massive selection you’ll find there. In fact, this selection can be overwhelming and some people consider it a con, but if you want variety, there is almost nothing better.
When it comes to user support, you shouldn’t have a problem. Apple support is famously strong and your position as a user is strengthened if you actually buy media from the iTunes Store. If you’re hoping to troubleshoot alone, you’ll find 18 year’s worth of help just waiting for you online
Where can you run this program?
This version of iTunes is designed to be downloaded on Windows. You can also get a version of iTunes from the Windows Store. From the iTunes homepage, you’ll find versions for Mac, tablet, and mobile.
Is there a better alternative?
There are lots of alternatives for iTunes, but whether or not they appeal to you depends very much on how you like to listen to your media. VLC provides another classic media player for Windows but lacks the ready-made curated audio books, podcasts, store and more of iTunes.
Spotify is much closer in terms of media variety but, of course, doesn’t support video and offers much less customization.
In short, you’ll be guided by the amount of control you want, the variety of media you want waiting at your fingertips, and whether or not you want a quick path into the Appleverse. If you want all three, then iTunes is in a class all of its own.
Our take
iTunes is much improved but still only of serious interest to people with non-standard use cases.
Should you download it?
Yes, it’s a pretty good app, but only if you like to buy your media, if you have a lot of media on your computer, or you really, really like iTunes. For everyone else, it’s not really necessary.
- Looks great
- Less bloated than previous versions
- Central media control
- iTunes Store offers huge variety
- Good customization and playback options
- Still a pretty big app
- Many will feel it offers too much choice
- Has a bad reputation
Tutorial of Installing Latest or Older Version of iTunes on Windows
iTunes is built-in Mac OS X/11; however, you have to install iTunes on Windows 11/10/8.1/8/7 and earlier manually. As a versatile utility for iOS devices, you may need iTunes to back up and restore your iPhone, do troubleshooting, or purchase content.
According to our research, some iPhone users complained that iTunes won’t install on PCs. That may be due to iTunes install extra software during installation. In this article, we will show you a concrete tutorial of installing iTunes on your Windows 11/10/8.1/8/7 properly.

Install iTunes
- Part 1: How to Install iTunes
- Part 2: Best iTunes Alternative: MobieTrans
Part 1 : How to Install iTunes
Since April 2018, Apple made iTunes available to Microsoft Store. However, it is only available to Windows 10/11. People who use Windows 7 cannot install iTunes from Microsoft Store.
How to Install iTunes on Windows 10/11
Apparently, Microsoft Store offers more benefits to make the switch of iTunes installation and update worth it. That could minimize the possibility that iTunes won’t install. Plus, it simplifies the process of iTunes installation.
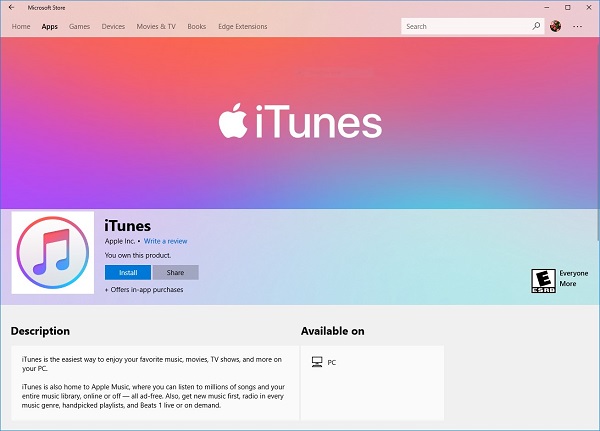
Step 1: Launch the Start menu at bottom left corner, scroll down and click Microsoft Store to open it.
Step 2: Click the Search icon, enter iTunes and press the Enter button on your keyboard. Then select the first result to open the iTunes installation page.
Step 3: Scroll down and go to the System Requirements tab. Make sure that your Windows is available and click the Get Button
Step 4: When prompted, click Yes to confirm it to continue the download iTunes. Wait until you get the notification to Launch or Pin iTunes.
Now, you can find iTunes in your Start menu
Note: The Microsoft Store version of iTunes follows a different directory compared to the stand-alone version.
Stand-alone iTunes: C:\Users\ \AppData\Roaming\Apple Computer\MobileSync\Backup
Microsoft Store version: C:\Users\ \Apple\MobileSync\Backup
How to Install iTunes on Windows 7
The latest version of iTunes installation from Microsoft Store is only available to Windows 10/11. So, you have to get iTunes from Apple’s website if you are using Windows 8.1/8/7. Fortunately, iTunes is free to download and use.
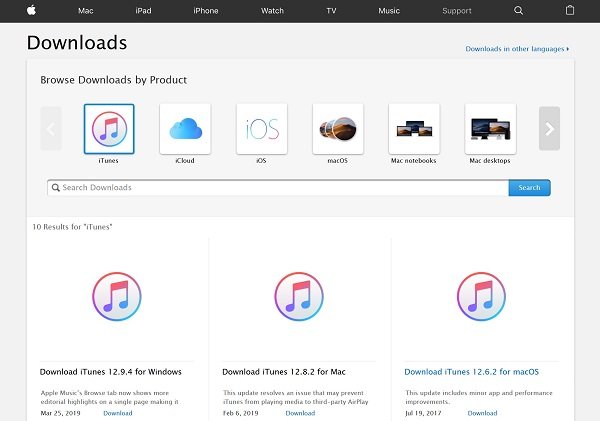
Step 1: Run your web browser, such as Chrome, IE, Firefox and more. Copy and paste https://support.apple.com/downloads into the address bar, and press Enter button to open Apple’s download page.
Step 2: Select iTunes on the top list to open the iTunes download page. Read the system requirements under each iTunes download title and press the Download link under the right one. Get the latest iTunes installer or old version to your desktop.
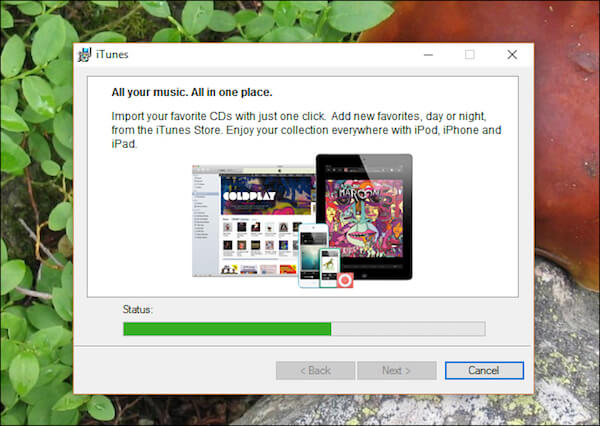
Step 3: Next, double-click the installer and click the Run button to start installing the latest or old version of iTunes.
Step 4: On the Installation Options screen, check Add iTunes shortcut to my desktop or not based on your need. Pick up your favorite language from the dropdown list and keep the default Destination Folder .
Step 5: Click the Install button to confirm and start iTunes installation on Windows 7. When it is done, hit the Finish button to complete it.
What to Do If iTunes Won’t Install on PC
Sometimes, you cannot install iTunes on your PC, especially the stand-alone version. The tips below are used to fix the issues.
Make sure you are logging into the Administrator account on your PC.
iTunes for Windows requires Windows 7 or later with the latest Service Pack installed. If you are using other versions of Windows, you have to download the old iTunes.
For Windows 10/11 users, go to Microsoft Store to get iTunes if the stand-alone version does not work.
Right-click on the iTunes installer and select Run as administrator when start iTunes installing.
If you have installed iTunes previously, uninstall it and Apple components. Then try iTunes installation again.
Antivirus software may block iTunes, so you’d better disable it during the process.
Part 2: Best iTunes Alternative: MobieTrans
iTunes is plump as Apple continues introducing features into it. Apeaksoft MobieTrans is the best alternative to iTunes with a lot of benefits.

Recommendation
- Sync data between iPhone and PC, Android or another iPhone.
- Support all data types on iOS including contacts, photos, SMS, etc.
- Let you preview iOS data on PC for backup, transfer or managing.
- Work for iPhone and iPad running iOS 17/16/15/14/13/12/11 or earlier.
In a word, it is the best option to manage iPhone data and files if iTunes won’t install on your PC.
How to Manage iPhone Data without Installing iTunes on PC
Step 1: Install the best iTunes alternative
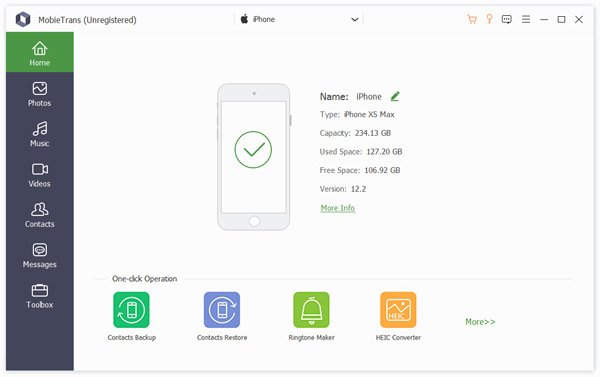
MobieTrans is a desktop application, so you need to download and install it to your PC. It is compatible with Windows 11/10/8.1/8/7.
Then connect your iPhone to your computer with the Lightning cable came with your device. Launch the best iTunes alternative to let it detect your iPhone.
Step 2: Add files to iPhone
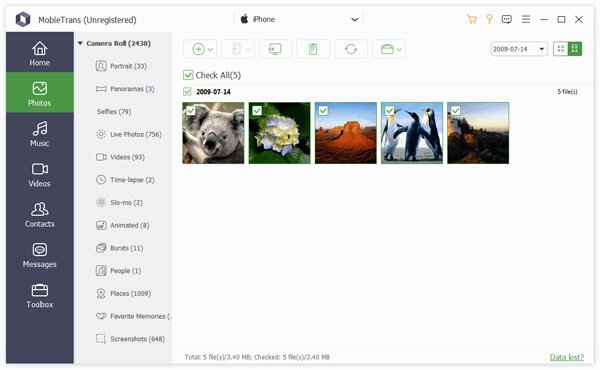
We use photos as the example to tell you how to add files to iPhone. Go to the data type from the left sidebar, such as Photos . Click the Plus icon to open the Explorer window, navigate to the photos and add them to iPhone.
Step 3: Back up data from iPhone to PC
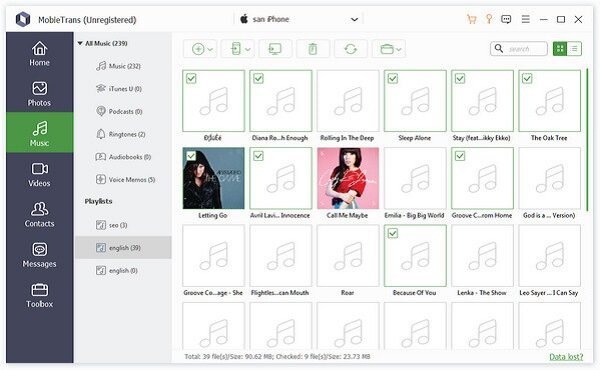
To transfer files, like music, from iPhone to your hard drive, go to the Music tab and preview all songs stored on your iPhone. Check all songs you want to backup, click the PC icon on the top ribbon and select your PC . A few seconds later, you can find the music on your hard drive.
This tutorial has shared the methods to install iTunes on Windows 11 and earlier. As you can see, it is a bit different to achieve it on various operating systems. For Windows 10/11, Microsoft Store is the best place to get iTunes. Of course, the stand-alone iTunes is available to Windows 10/11 as well. Moreover, Apple’s iTunes download page offers the old versions for various systems. If you do not like iTunes, you can try third-party software, such as Apeaksoft MobieTrans. It is not only easy to use, but available to a wide range of systems. More questions? Leave your messages below.
- iTunes Tips and Solutions
- 4 Real Fixes — iTunes Won’t Let Me Add Music to iPhone
- 7 Ways to Fix iTunes Keeps Asking for Apple ID Password on PC/iPhone
- 10 Free Ways to Speed Up Slow iTunes on Windows 11/10/8/7 & Mac
- 4 Methods to Transfer iBooks from iPad to Computer
- Top 4 Methods to Sync Facebook Contacts to iPhone (iOS 17 Supported)
- How to View/Check iCloud Backups
- Top 4 Verified Ways to Export iTunes Playlists Quickly
- [5 Efficient Fixes] iTunes Store Temporarily Unavaiable/Not Working
- 7 Ways to Fix iCloud Backup Not be Completed/Failed (iOS 17 Inlcuded)
- 3 Easy Ways to Delete Movies or TV Shows from iTunes
- If I Uninstall iTunes Will All My Music Also Be Deleted
- Guide to Restore/Redownload iTunes Purchases (Hidden/Deleted/Missing)
- Best Ways to Transfer iTunes Library from to Another Computer
- How to Move Documents from iCloud Back to Mac
- Step-by-step Tutorial to Delete iTunes Library and Start again

- 10 Free Tips to Make Slow iTunes Faster (12.9/12.10/12.11/12.12)
- Tutorial to Backup iTunes to iCloud or Computer with Multiple Ways
- How to Restore iPhone/iPad from iTunes
- Download Center
- Apeaksoft Store
- Company
- About Us
- Contact Us
- Terms & Conditions
- Privacy Policy
- License Agreement
- Product
- iPhone Data Recovery
- Android Data Recovery
- iPhone Transfer
- iPhone Eraser
- Data Recovery
- Support
- Support Center
- Solution
- Site Map
- FAQ
Как сделать и установить рингтон для iPhone без iTunes
Когда дело касается установки индивидуального рингтона на iPhone, у многих пользователей возникает куча вопросов, и это нормально, потому как Apple не сильно-то и любит, когда кастомизируют её систему. В большинстве инструкций по этому запросу требуется наличие компьютера с iTunes. А что делать, если рядом (или вообще) нет ни PC, ни Mac?
Как сделать и установить рингтон прямо на iPhone без использования iTunes
1. Скачайте и установите программу для создания музыки GarageBand от Apple.
2. Откройте приложение GarageBand.
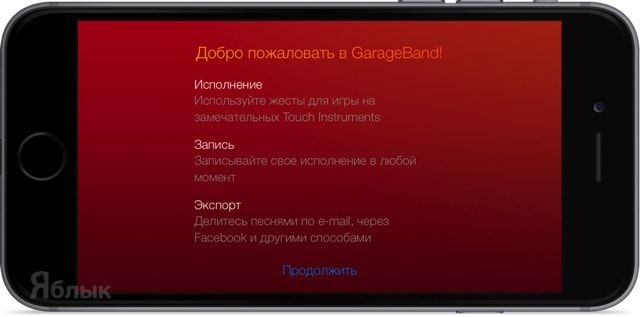
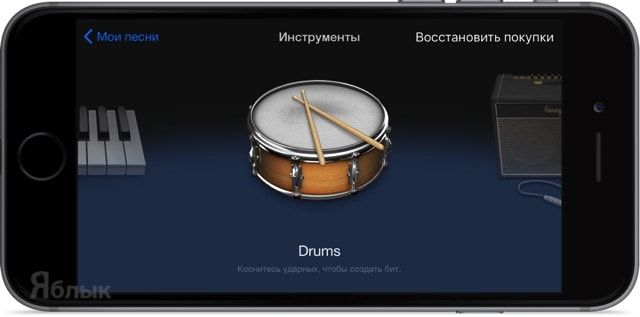
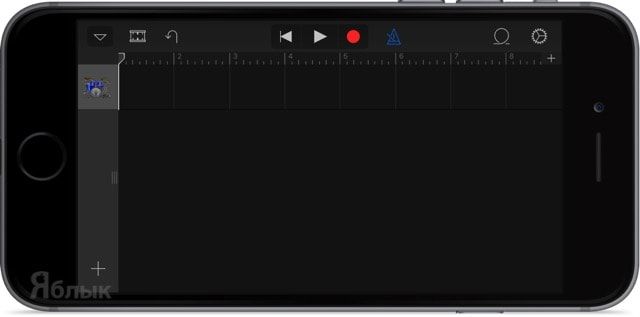
3. Выберите один из инструментов, например Drums.
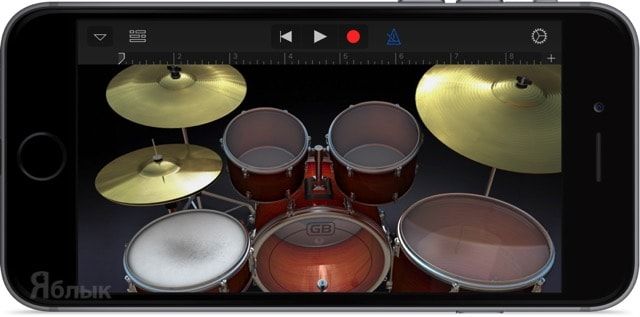
4. В левом верхнем углу нажмите на кнопку, которая открывает раздел «Просмотр».
5. В правом верхнем углу тапните по кнопке с петлёй, открывающей браузер для поиска музыки на устройстве или в разделе Apple Loops.
6. Перейдите на вкладку «Музыка».
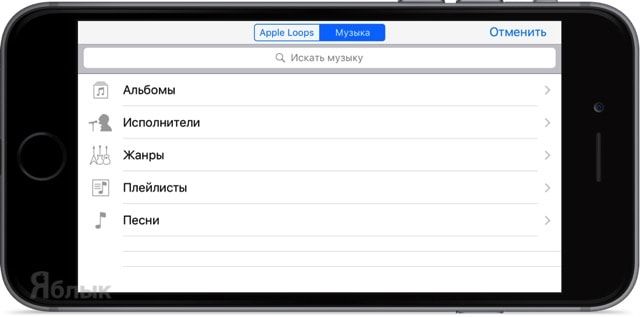
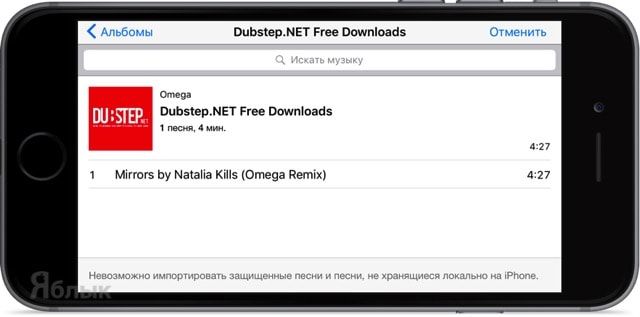
7. Отыщите и импортируйте интересуемый трек, который вы хотели бы слышать в качестве рингтона. Чтобы это сделать, сделайте долгий тап по выбранному треку и удерживайте палец до тех пор, пока не появится значок музыкального файла, который можно разместить в разделе «Просмотр». Песня обязательно должна быть сохранена на iPhone для прослушивания офлайн.
8. Потянув за левый или правый край песни (они будут становиться жёлтыми), вы можете выбрать необходимый фрагмент трека для рингтона и сделать композицию короче (делать рингтон длиннее 30 секунд не имеет смысла, но можете не заморачиваться, потому как GarageBand автоматически потом обрежет длину рингтона).
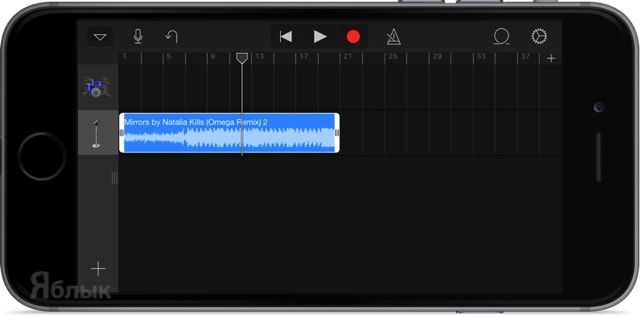
9. В верхнем левом углу нажмите на кнопку с изображением галочки, а затем выберите раздел «Мои песни». Рингтон автоматически сохранится в медиатеке устройства.
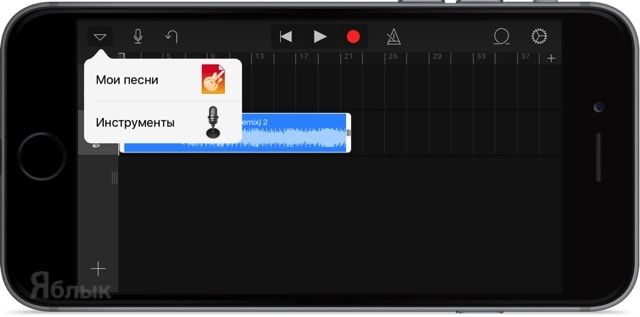
10. Нажмите на название рингтона под обложкой и переименуйте его. Затем нажмите кнопку «Done».
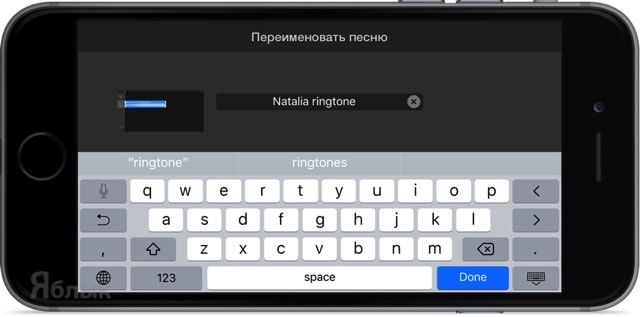
11. Зажмите палец на созданной композиции до тех пор пока мы не войдём в режим изменения (всё будет трястись). Нажмите кнопку шаринга.
12. В появившемся меню выберите «Рингтон».
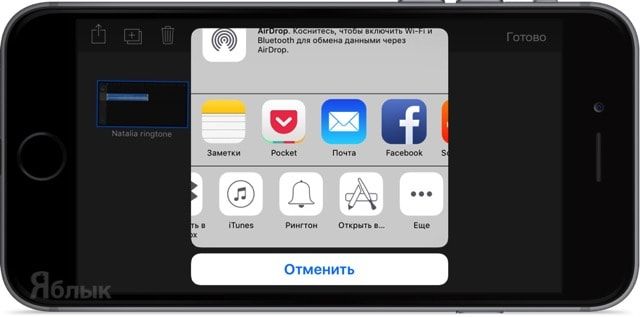
13. Нажмите кнопку «Экспортировать».
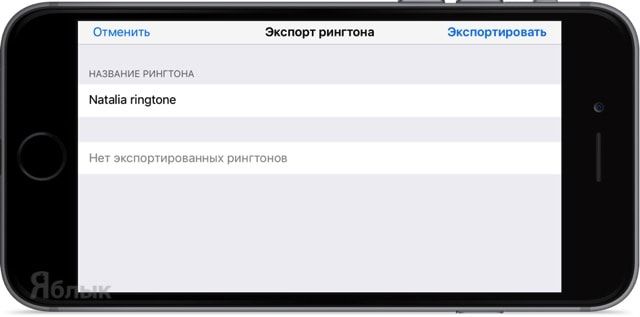
14. В появившемся окне нажмите кнопку «Использовать звук как…»
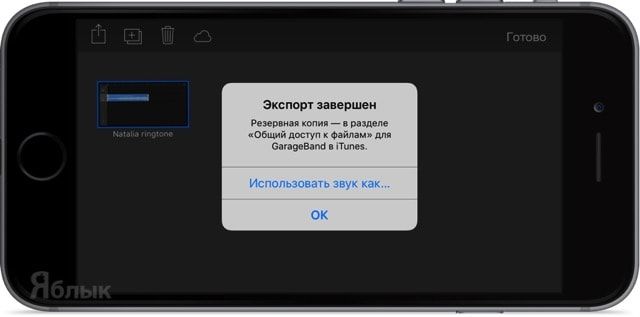
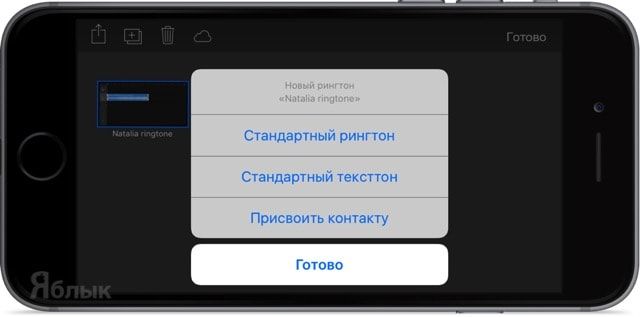
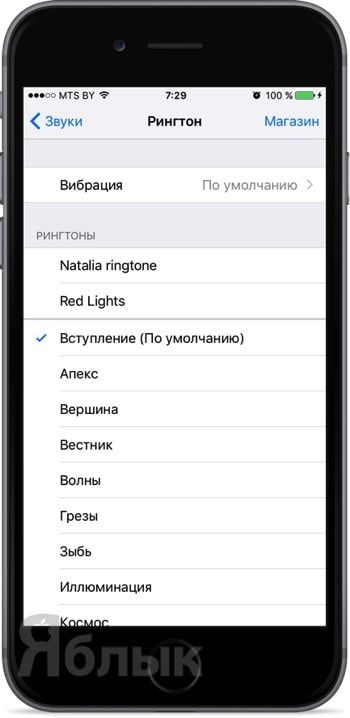
или пройдите в Настройки → Звуки → Рингтон (в верхней части списка будут отображаться пользовательские рингтоны).
- Как делать рингтоны (мелодии) на iPhone при помощи iTunes.
- Как установить классический рингтон Маримба на iPhone с iOS 9.
- Как назначить рингтон для контактов iPhone на Mac.
- Как создать будильник с радио Beats 1 вместо рингтона на iPhone (джейлбрейк).